Linking Google Ads and Google Analytics 4 (GA4) to your Next.js site

When releasing Agile Analytics we struggled linking Google Ads to Google Analytics v4 to our fine ReactJS site. Here is a small step-by-step guide on how to achieve this:
In our examples we will connect Google Ads to our Next.js website in vanilla way (without any additional plugins). Please note that we have GA4 account already connected.
# Part 1. Connect your Google Ads to your Google Analytics 4 (GA4) account {#part-1}
# Step 1. Connect you Google Ads account to Google Analytics 4: {#part-1-step-1}
In Google analytics go to Admin, choose your property and then click on Google Ads Links:
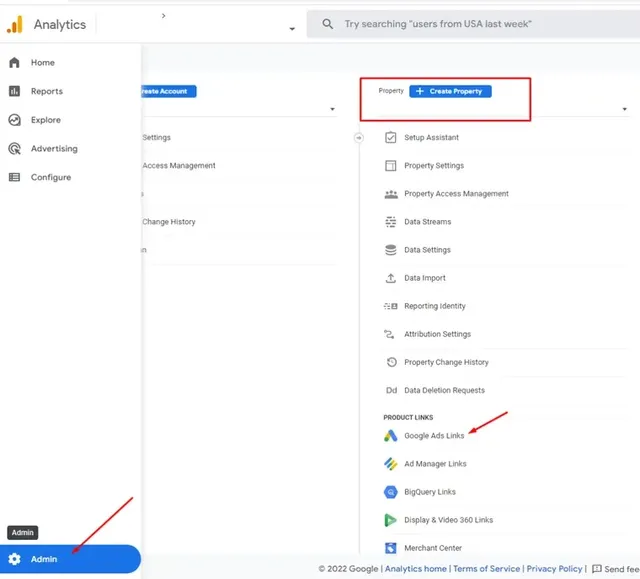
Press Link and add your Google Ads account.
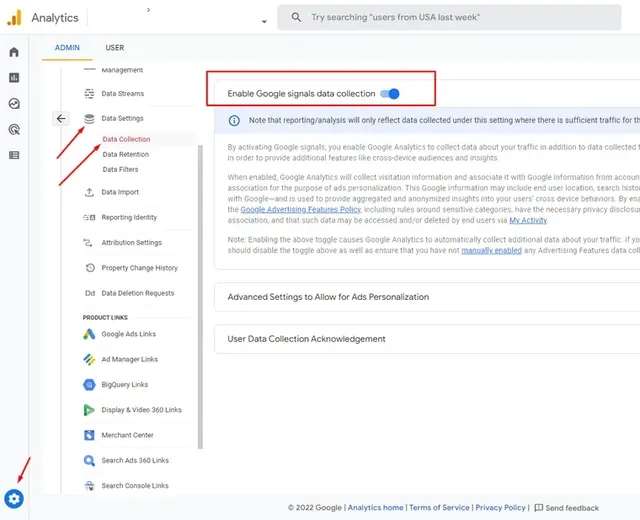
# Step 2. Enabling Google Signals: {#part-1-step-2}
Go to Admin ---> Data Settings ---> Data Collection ---> Enable Google signals data
That`s it! Now you have to wait while Google Analytics starts to gather and display data from your Google Ads campaigns. Please note that it could take up to 3 days for data to start displaying in GA4 reports.
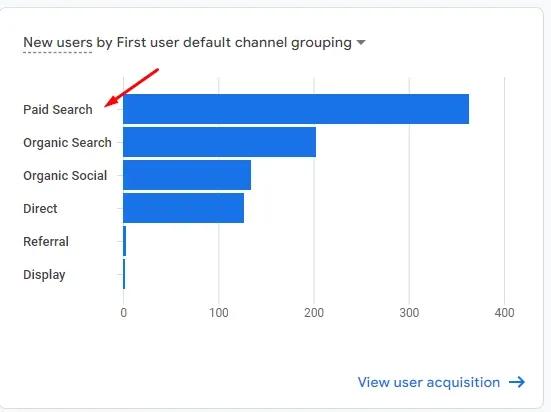
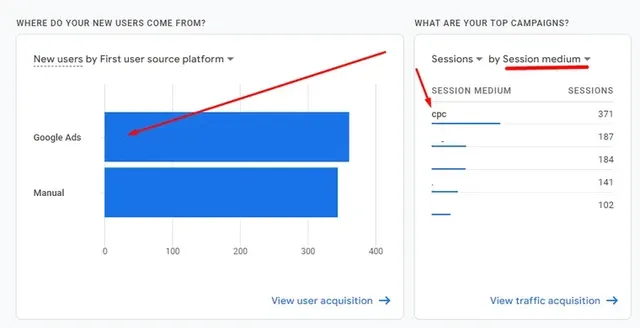
You`ll be able to see data from Google ads in you Reports snapshot:
- Google Ads as a source;
- cpc as a medium;
- Paid search as a default channel grouping
# Part 2. Connect your Google Ads account to your website {#part-2}
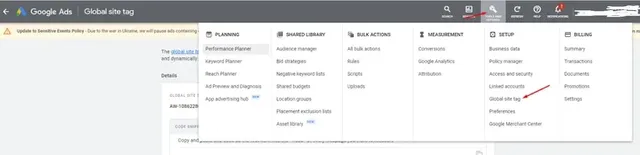
# Step 1. Get Global site tag code {#part-2-step-1}
To find you code in Google Ads go to Tools and settings ---> Global site tag
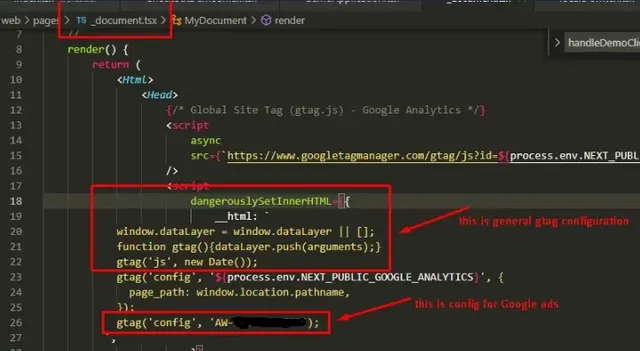
# Step 2. Add Global site tag code to you website {#part-2-step-2}
For Next.js paste the code in _document.tsx file:
# Part 3. Add and set up Google Ads conversions {#part-3}
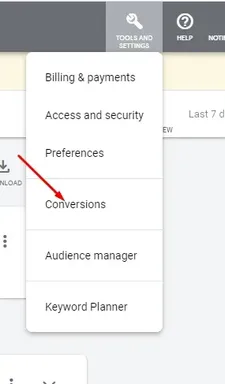
# Step 1. Adding Conversions in Google Ads {#part-3-step-1}
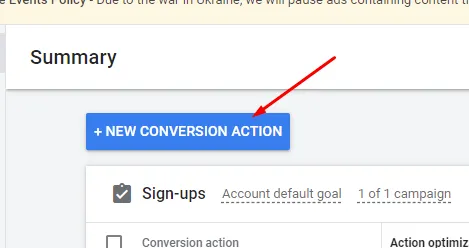
Go to Tools and settings ---> Conversions and click New conversion action.
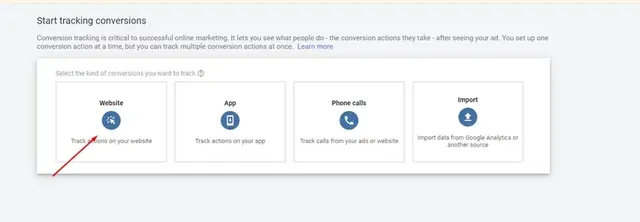
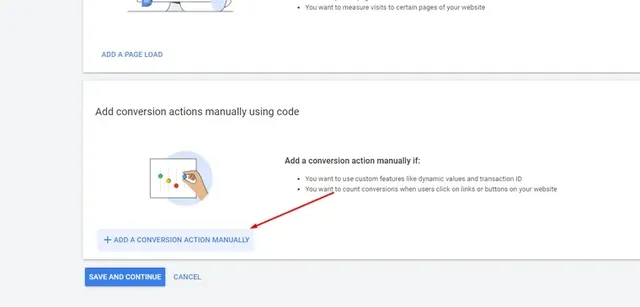
For a website we usually need to add conversion manually.
You can find info on how to setup conversion in Google Ads documentation
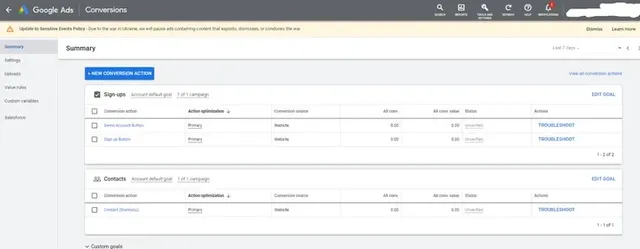
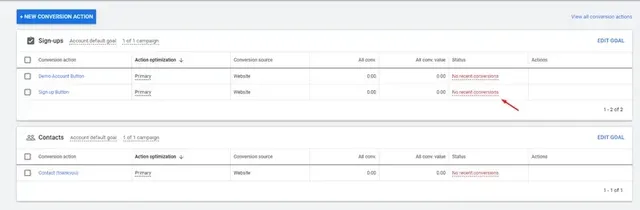
After setting up a conversion you`ll see it in the conversions screen:
# Step 2. Adding Google Ads conversions to a website: {#part-3-step-2}
To get gtag code of conversion, click on the Conversion name ---> Tag setup ---> Install the tag yourself.
Follow instructions and cope conversion code snippet:
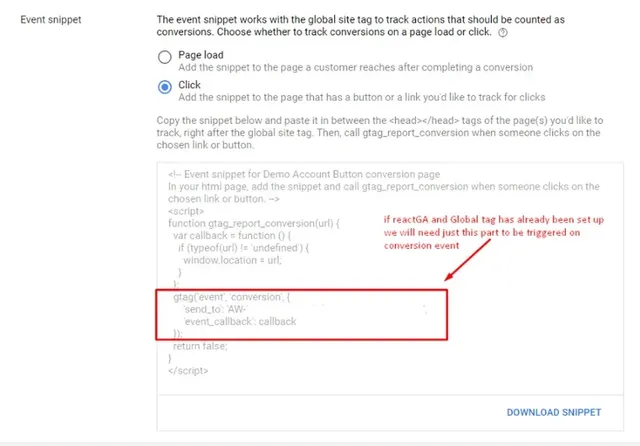
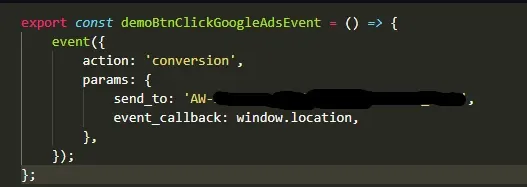
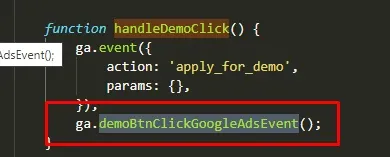
For example, in our code we`ve created a function which sends the conversion event. And this function is called on particular button click
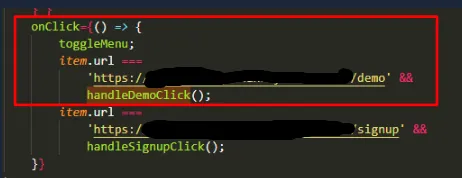
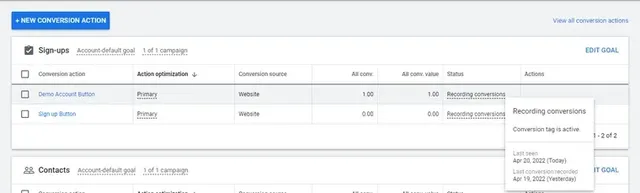
To see if conversions were verified, try to trigger these events, and then check their status in Google adds in 3 hours:
No resent conversions means that you conversion was verified and will be displayed as soon as conversion action happen

Lightning-Fast Site, Awesome Conversion
Deliver content worldwide with a site that never slows down. Forget the WordPress or Magento delays—fast, safe, and cloud-based!
Read more:
Linking Google Ads and Google Analytics 4 (GA4) to your Next.js site
When releasing Agile Analytics we struggled linking Google Ads to Google Analytics v4 to our fine ReactJS site. Here is ...
What’s wrong with GA4, or how to find essential reports in Google Analytics
Google Analytics 4 (GA4) reporting has received some criticism and feedback from users since its release. Despite GA4 of...
ZEN Software upgrades Wordpress Filogic.nl to Open Source Headless Cloud Solution for Unmatched Performance
Alkmaar, November 2023 — ZEN Software, a leader in innovative web solutions, proudly announces its latest success with F...
The $100 billion product demo failure: Google’s BARD
Since the launch of chatGPT, it’s been DEFCON 1 at Google HQ. ChatGPT could easily lead to a golden-egg-laying-goose kil...

Migrate from WordPress to a new CMS
WordPress has been our Content Management System (CMS) since forever at ZEN Software. Why would we ever change a winning...

A Developer's Guide to Agile Rollouts: adding Feature Flags in React
**Feature flags**, also known as **feature toggles** or **feature switches**, are a powerful tool in software developmen...